
How to Setup a Paid Nostr Relay
Using the ZBD API to earn Bitcoin for running Nostr relay infrastructure

ZEBEDEE is the next-generation Fintech built on top of Bitcoin and Lightning Network protocols. Looking to build your next game or app with Bitcoin capabilities?
ZBD API is your one-stop solution!

This is a quickstart guide for those that wish to run a paid Nostr relay. There are now tens of relay implementations out there, but only one with plug-n-play support for Bitcoin Lightning Network payments — Nostream.
This is a technical walkthrough of how to get it all setup!
VM Setup
Choose your preferred VM provider - whether you use Linode, Digital Ocean, AWS, GCP, Azure, etc. For this guide I used the following setup in DigitalOcean:
Ubuntu 22.10, 8GB memory, 160GB NVME SSDs
I recommend at least 8GB of memory given the resource intensive nature of always-on websocket connections. Once your instance is up and running, SSH into that VM and follow the next steps.
# Update deps
sudo apt update

# Install nodejs, npm, nginx, certbot
sudo apt install nodejs npm nginx certbot python3-certbot-nginx

# Setup new `nostream` user (don't run nostream on root)
useradd -m -G docker nostream
# If the group `docker` doesn't exist run groupadd docker

# Set new nostream user password
passwd nostream

# Set bash shell for nostream user
chsh -s /bin/bash nostream
Setup Docker + Install
Commands below will install Docker in your VM.
# Create the keyring folder
sudo mkdir -p /etc/apt/keyrings

# Fetch and add it to folder
curl -fsSL https://download.docker.com/linux/ubuntu/gpg | sudo gpg --dearmor -o /etc/apt/keyrings/docker.gpg

# Setup proper folder permissions
sudo chmod a+r /etc/apt/keyrings/docker.gpg

# Setup `apt` Docker repository (this is a one-liner)
echo \
  "deb [arch=$(dpkg --print-architecture) signed-by=/etc/apt/keyrings/docker.gpg] https://download.docker.com/linux/ubuntu \
  $(lsb_release -cs) stable" | sudo tee /etc/apt/sources.list.d/docker.list > /dev/null

# Install Docker
sudo apt update && sudo apt-get install docker-ce docker-ce-cli containerd.io docker-compose-plugin

# Check installation is successful by checking verions
docker --version
Setup NGINX
Use the commands below to setup NGINX reverse proxy.
# Delete the default nginx settings file
rm -rf /etc/nginx/sites-available/default

# Paste in new settings file contents (see heading NGINX Settings below)
sudo nano /etc/nginx/sites-available/default

# Restart nginx
sudo service nginx restart

# Map DNS A record to IP of VM machine (see DNS Settings below)

# Request SSL cert from letsencrypt/certbot
sudo certbot --nginx -d subdomain.mydomain.com
NGINX Settings
Use the contents below as the contents of the default NGINX settings file. Do remember to change the subdomain.domain.com to your domain.
server {
    server_name subdomain.domain.com;
    location / {
        proxy_set_header X-Forwarded-For $proxy_add_x_forwarded_for;
        proxy_set_header Host $host;
        proxy_pass http://127.0.0.1:8008;
        proxy_http_version 1.1;
        proxy_set_header Upgrade $http_upgrade;
        proxy_set_header Connection "upgrade";
    }
}
DNS Settings
To map your VM’s IP address to your subdomain.mydomain.com you need to have an A record like below in your domain DNS settings.

You may need to setup a static/reserved IP address in order to map the A record to the subdomain.mydomain.com.
ZEBEDEE Dashboard Setup
Let’s now go ahead and set up your ZEBEDEE account. Start by signing up at ZEBEDEE Developer Dashboard Sign Up.
Reach out to me on Twitter @andreneves or DM me on Nostr at andre@zbd.ai to get an invite code for the ZEBEDEE Developer Dashboard.

When you’re in, you will need to quickly verify your email address (look out for an email from ZEBEDEE with a 6-digit code). Once you’ve verified your email, head on over to the left-hand sidebar and click PROJECTS, then CREATE NEW PROJECT.
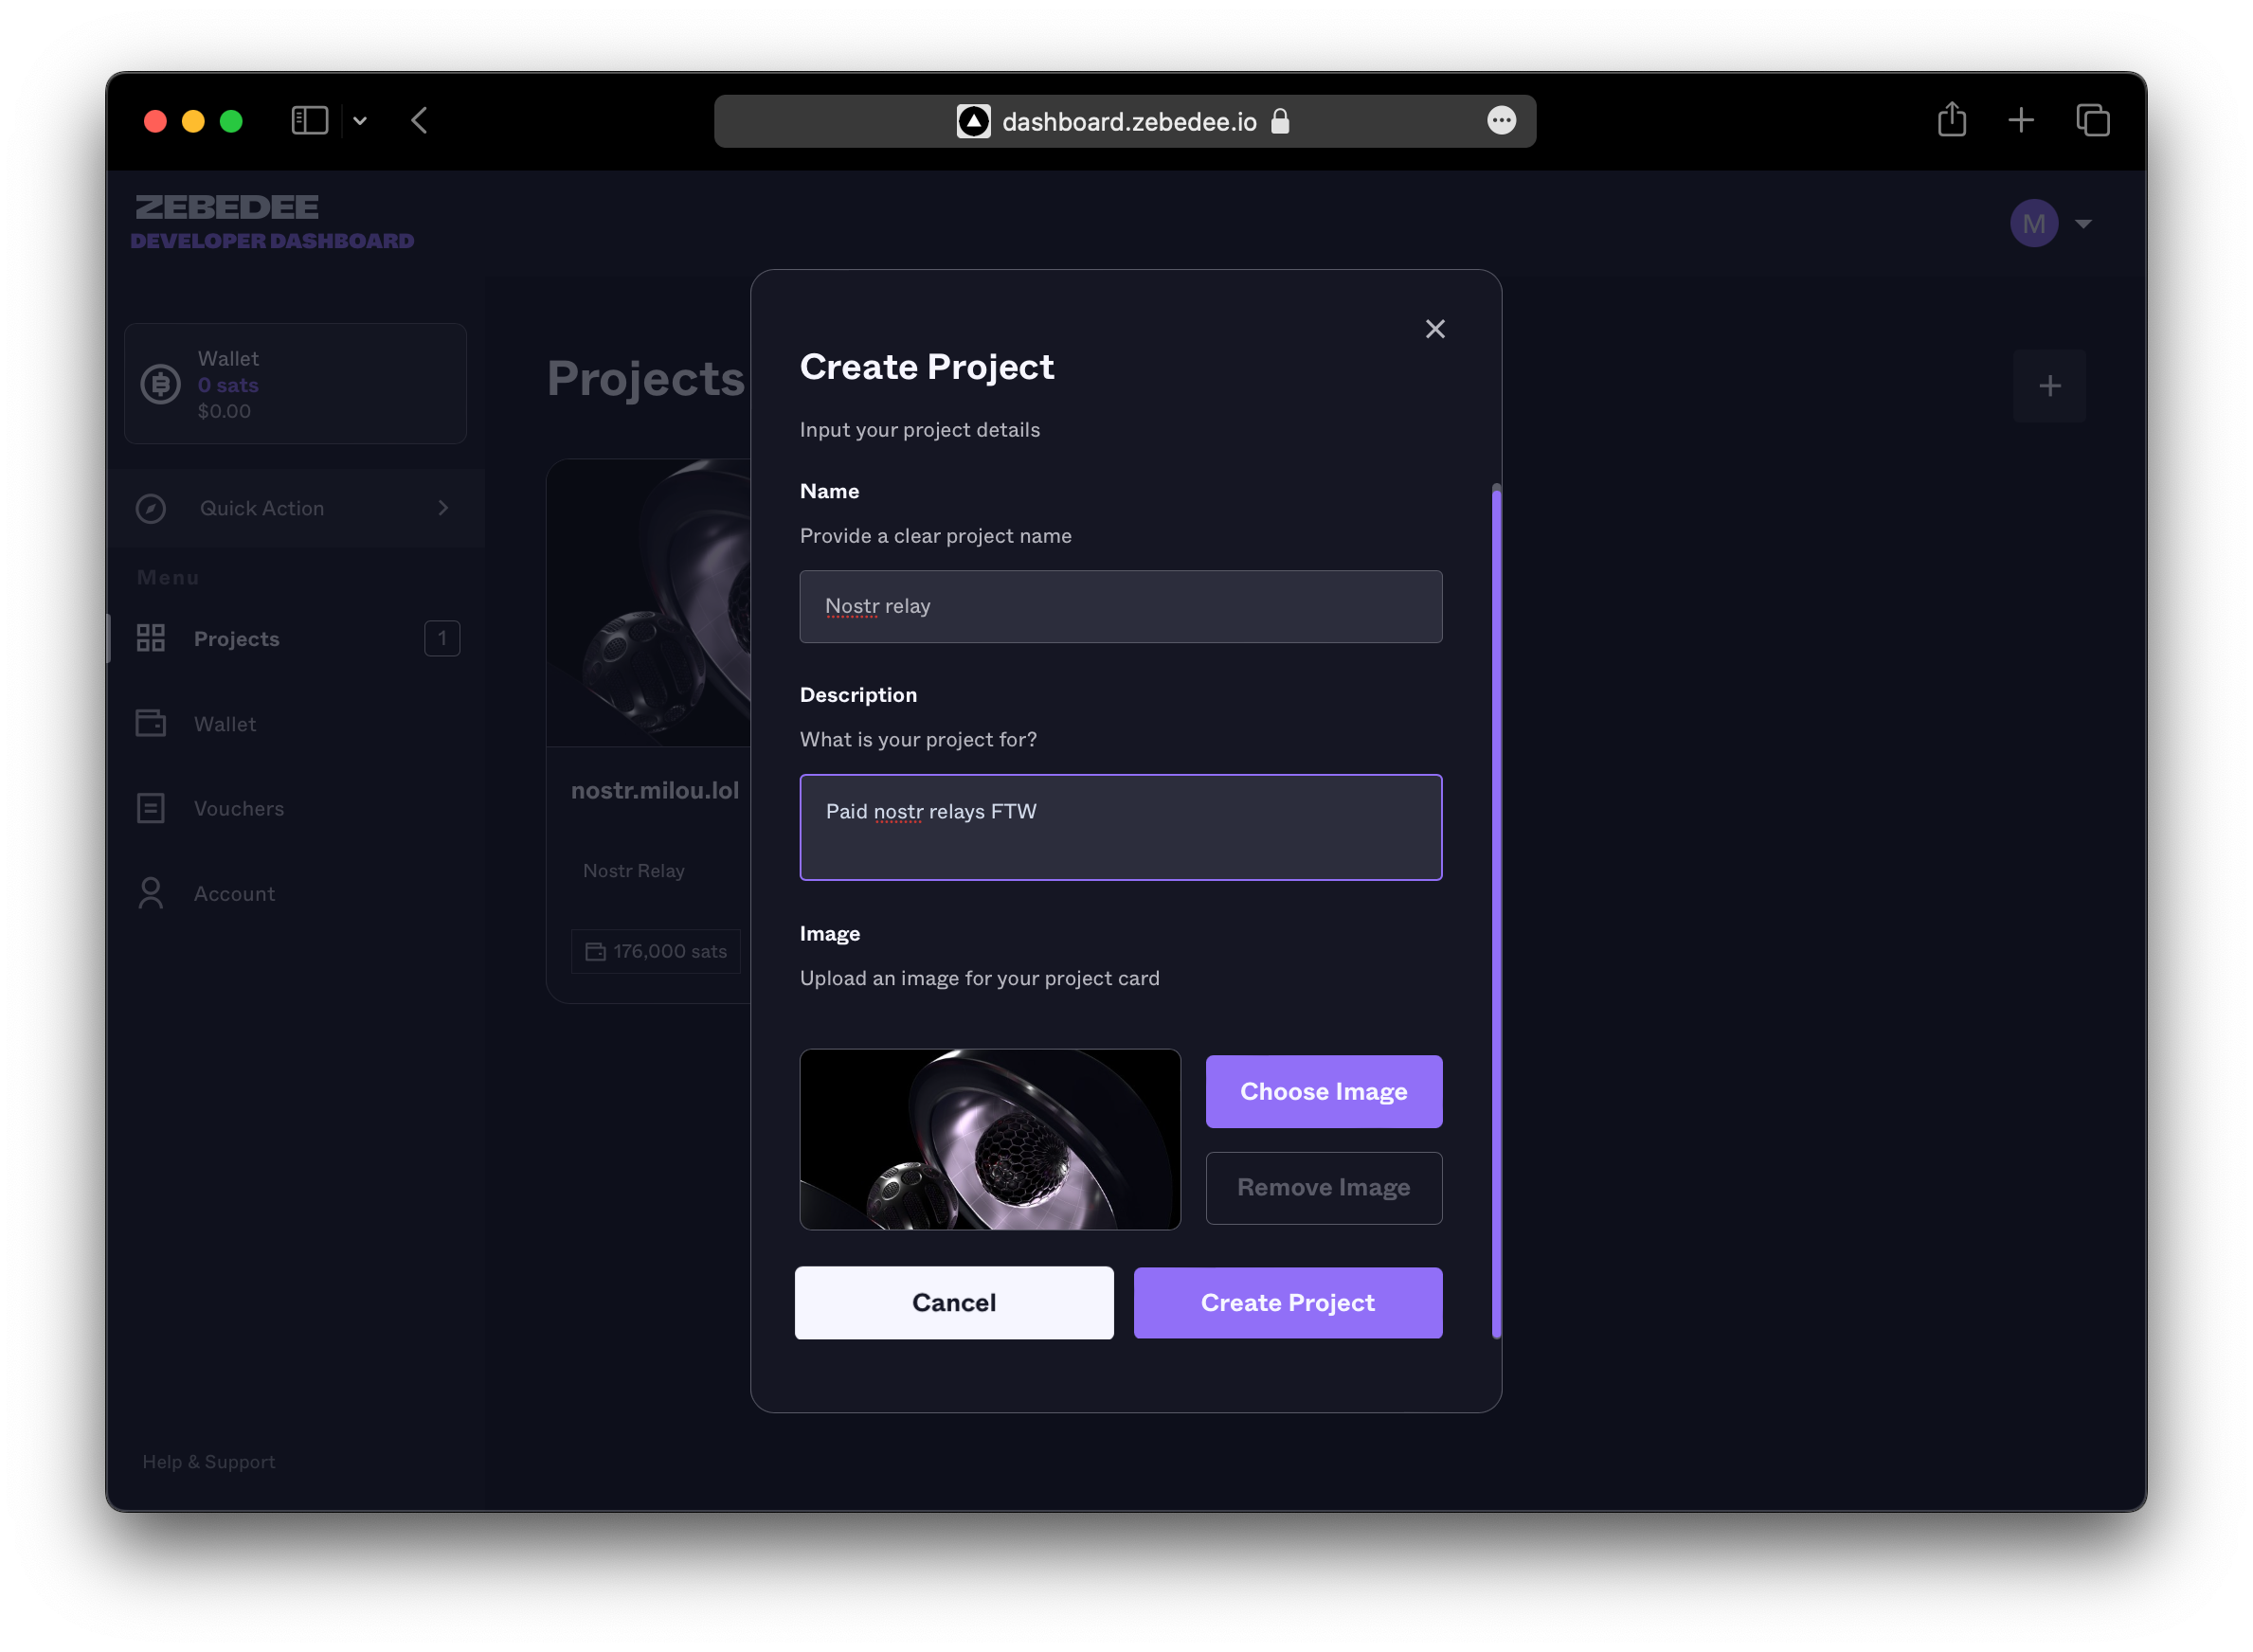
Once your project is created, you will be taken to the PROJECT DETAILS view. Each project in the dashboard has a fully-programmable Bitcoin Lightning wallet, and each wallet can be managed using the API Key provided in the API tab, as shown below.
Copy this API Key, you’re going to need it when setting up Nostream.

Bonus: you are also encouraged to place your VM’s IP addresses in the whitelisting field to ensure API calls to ZBD using your API Key are only ever coming from the provided IP addresses.
Now that we’ve gotten the ZBD API Key, let’s place it in the configuration file for Nostream and set it live!
Nostream Setup
Now that your VM is all setup, and you’ve got your ZBD API Key, let’s install and configure Nostream to run a paid relay powered by ZBD.
# Change to nostream user
su - nostream

# Clone `nostream` repo
git clone https://github.com/Cameri/nostream.git

# Open a TMUX session
# (to be able to detach and maintain process running)
tmux

# Start the relay
./scripts/start

# You want to start the relay once such that all Docker images are downloaded/built, and the default settings.yaml file is automatically copied over.

# Stop the relay (you will see the NOSTREAM logo once it's running)
Ctrl + C (you can use ./scripts/stop as well)

# Edit the settings file to your liking
# (see Settings.yaml Configuration below)

# Add local.env file to root
touch local.env

# Edit local.env file and add ZEBEDEE_API_KEY and SECRET
# SECRET is a 128bit random hash
nano local.env

ZEBEDEE_API_KEY="your API key goes here"
SECRET="your SECRET goes here"

# You may need to add a `env_file` property to docker-compose.yml
env_file
  - local.env

# Restart Nostream
./scripts/start

# To detach from the TMUX session
Ctrl+B  +  D
# To re-attach to the TMUX session
tmux a
Settings.yaml Configuration
Go ahead and edit the contents of your Nostream settings file. The file can be found at .nostr/settings.yaml
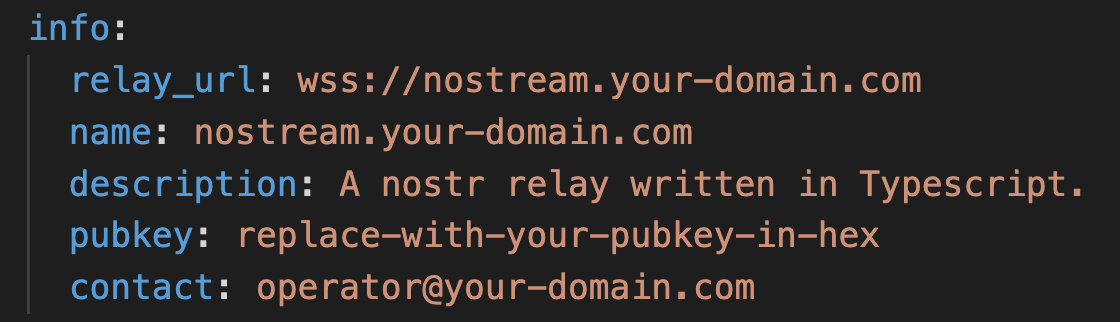
At first, make sure to change the info properties so they match your taste. This information is public and is provided to any client app that connects to your relay.
Then scroll down to payments properties and enable the ZBD processor and select the admission fee cost you’d like to charge. You can also add any pubkeys to a whitelist if you wish to bypass the charge.

Under paymentsProcessors make sure to change nostream.your-domain.com to your actual Nostr relay domain.

Change limits.event.pubkey.minBalance to the amount you are charging for admission to your relay. (this should not be 0)
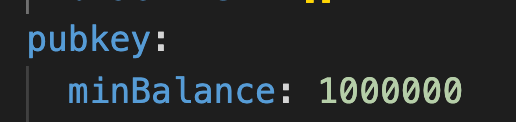
Your paid relay configuration is now complete! Go back up to continue with the commands and add your ZEBEDEE_API_KEY to local.env file.
Done!
Once you restart the relay, you should see a console that looks a little bit like this.

The special part is `Payments Provider: zebedee` and `Pay-to-relay = enabled`. You’re all set, let’s test the relay!
Check Relay Connectivity
In order to check that the relay is setup correctly, head on over to WebSocketKing and test the connection to your subdomain.domain.com.
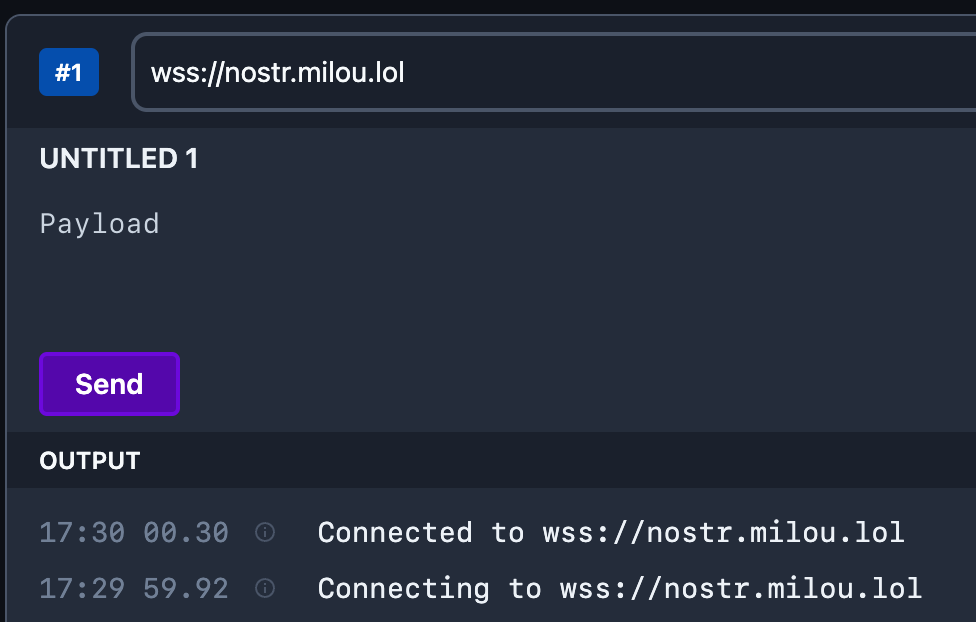
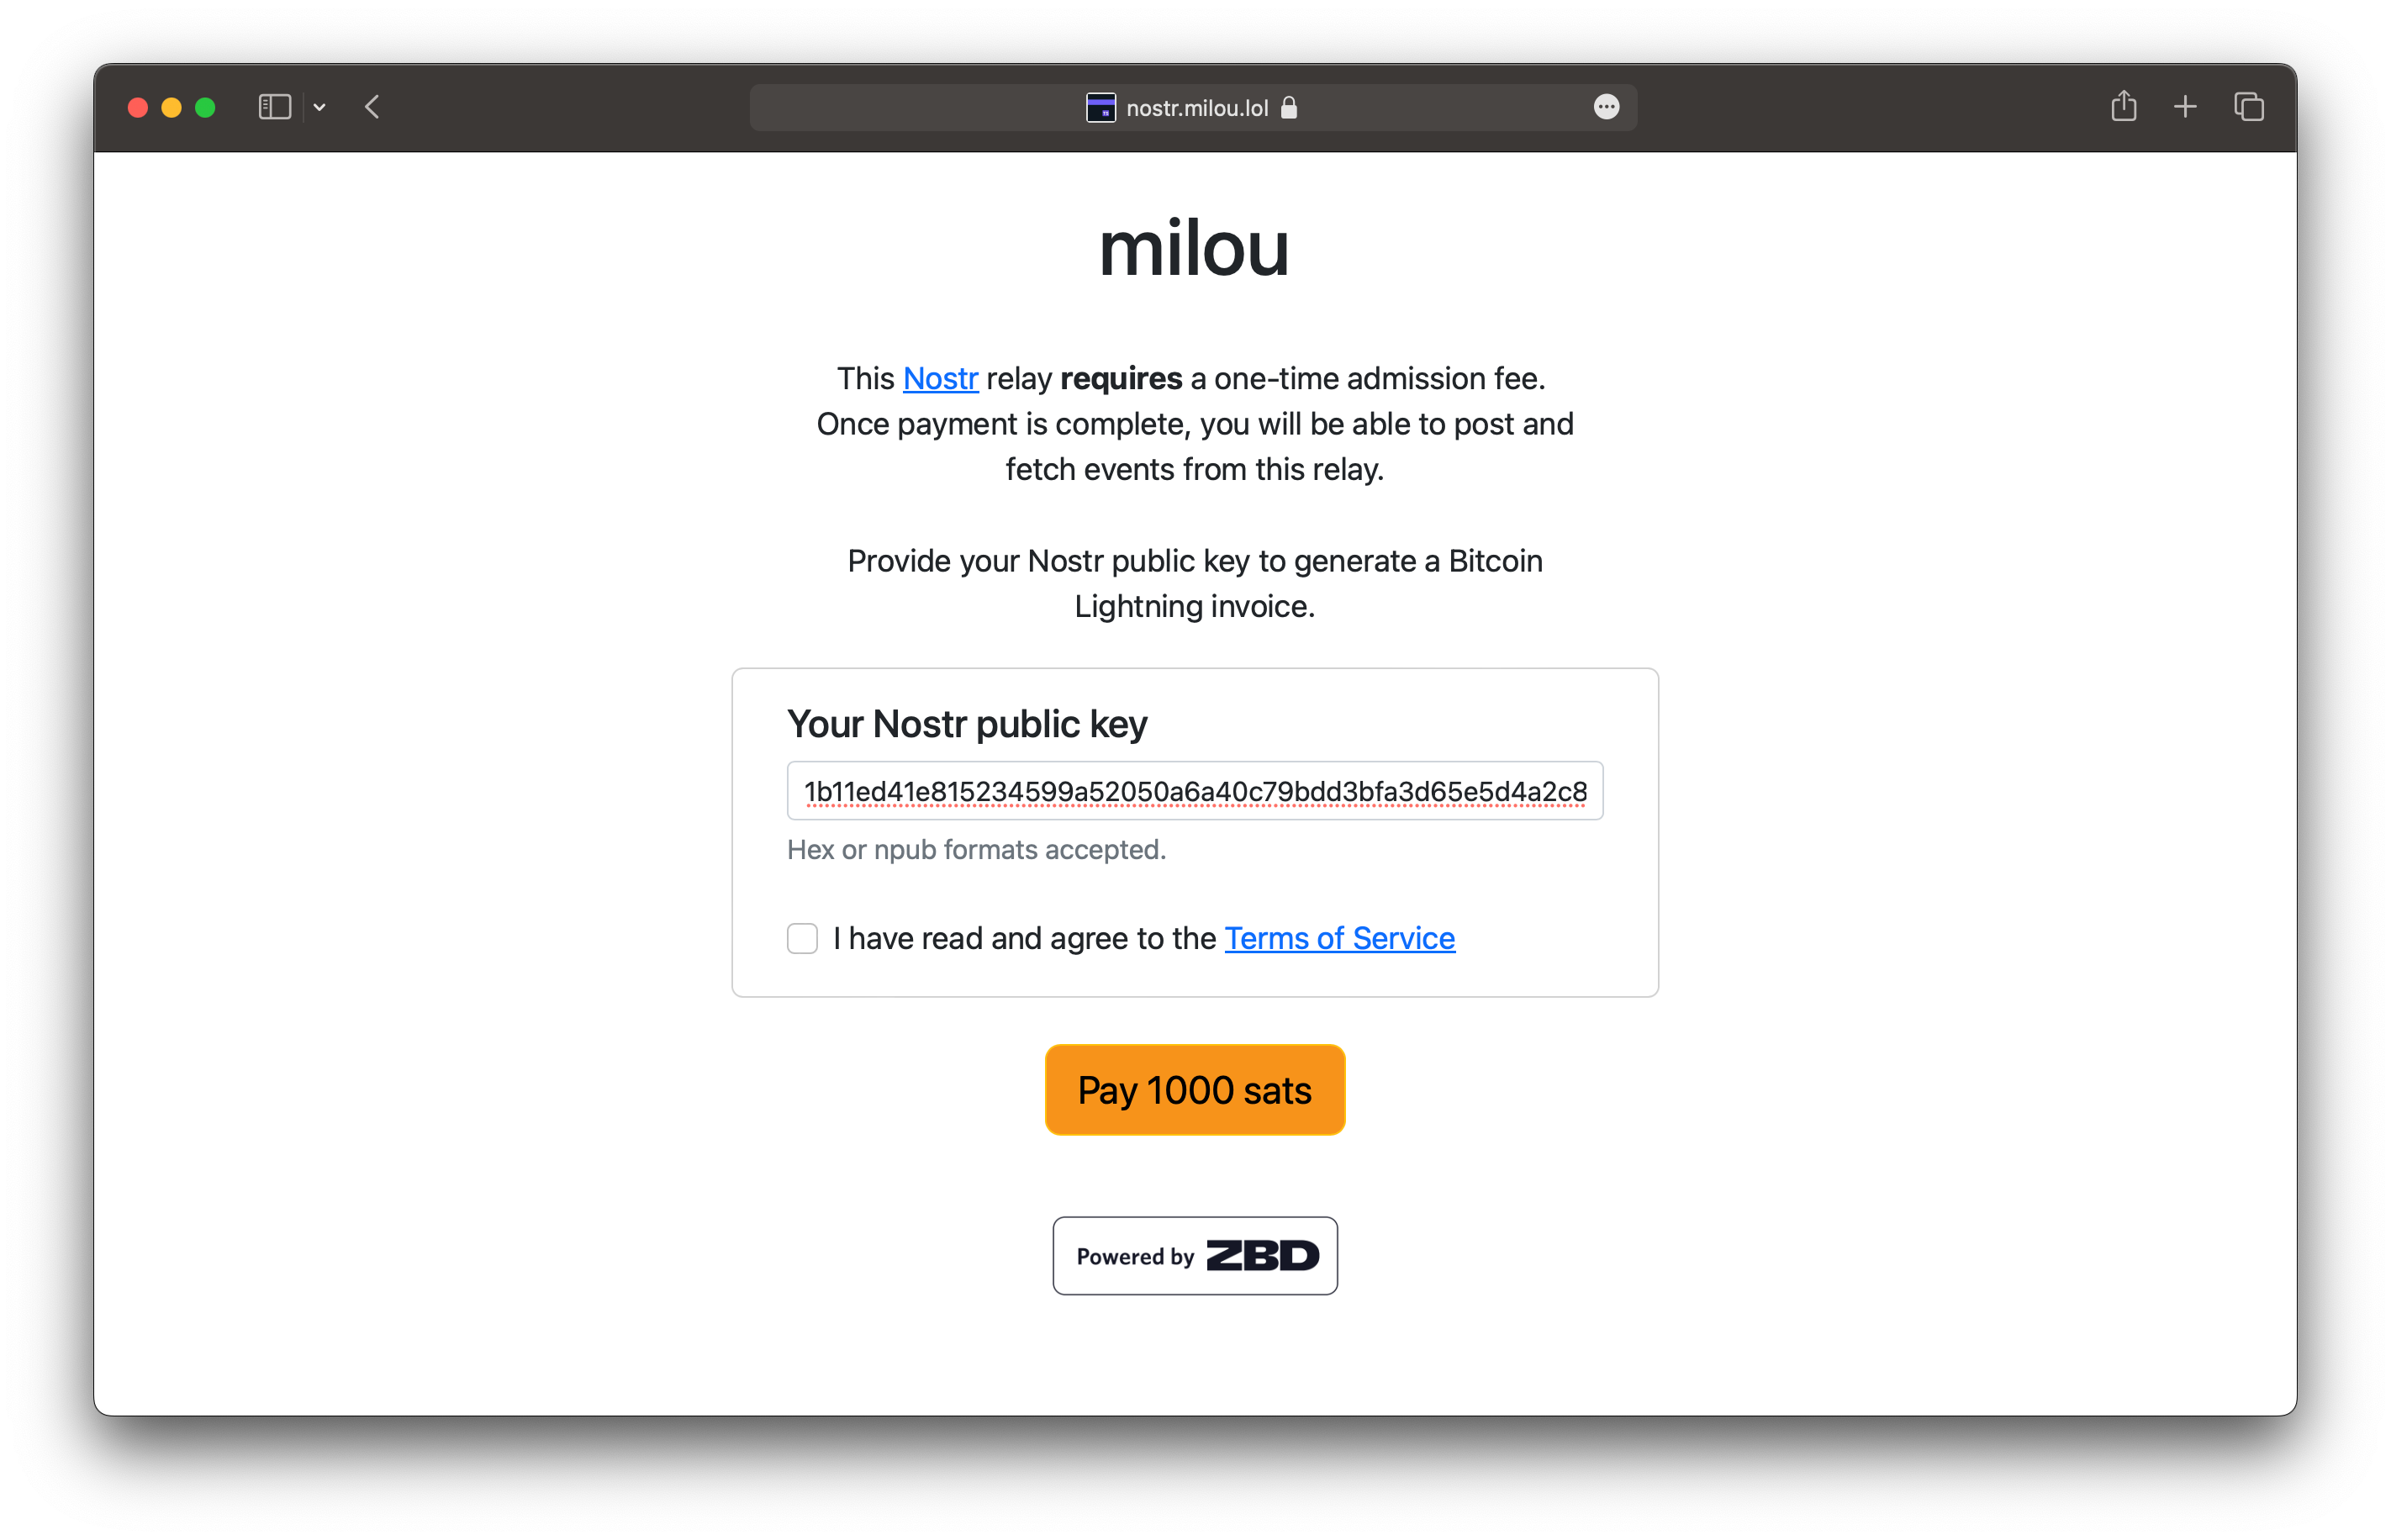
If you’re able to connect to your relay, then it is time to test that the paid access functionality is working. To go through that flow head on over to https://subdomain.domain.com and follow the admission payment flows.
For more details check out the How It All Works section on the The Rise of Paid Nostr Relays sister post below:
Upgrade Guide
If you’re updating from a previous version of Nostream to the latest pay-to-relay version, the commands below are for you:
# Stop nostream relay
./scripts/stop

# Remove old Docker network (you may not need this)
docker network rm nostr-ts-relay

# Stash any local git changes applied to the relay codebase
git stash -u

# Pull latest nostream code
git pull

# Bring back locally stashed git changes
git stash pop

# You may want to change your settings.yaml here

# Restart relay
./scripts/start
Security
You also want to make sure to apply a sensible set of firewall port accesses. The bare minimum would be to open ports 80 and 443 for HTTP/HTTPs and WebSockets. Port 22 is default for SSH’ing into a VM. (This config really depends on how YOU set up your Nostream VM).
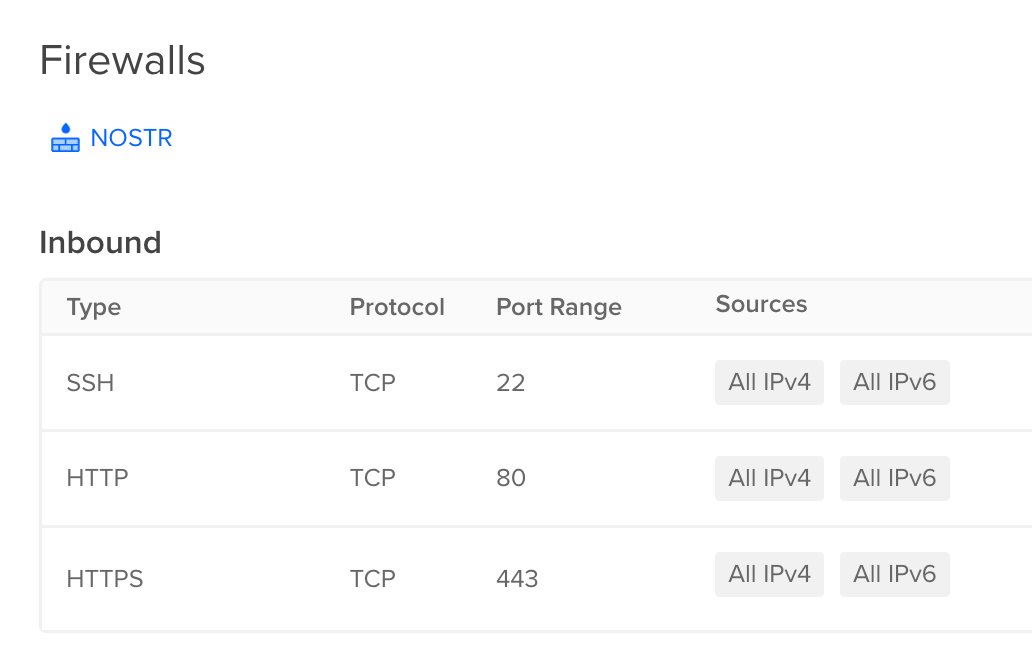
In Digital Ocean, you can head to Droplet > Networking > Firewall.
Conclusion
That’s it! You’re all setup. This Nostr relay will now only accept fetching and posting of new events by those users that have paid the admission fees.
Now sit back and watch those sweet sweet satoshis stream into your ZEBEDEE wallet as you provide decentralized communications relay infrastructure to the world!
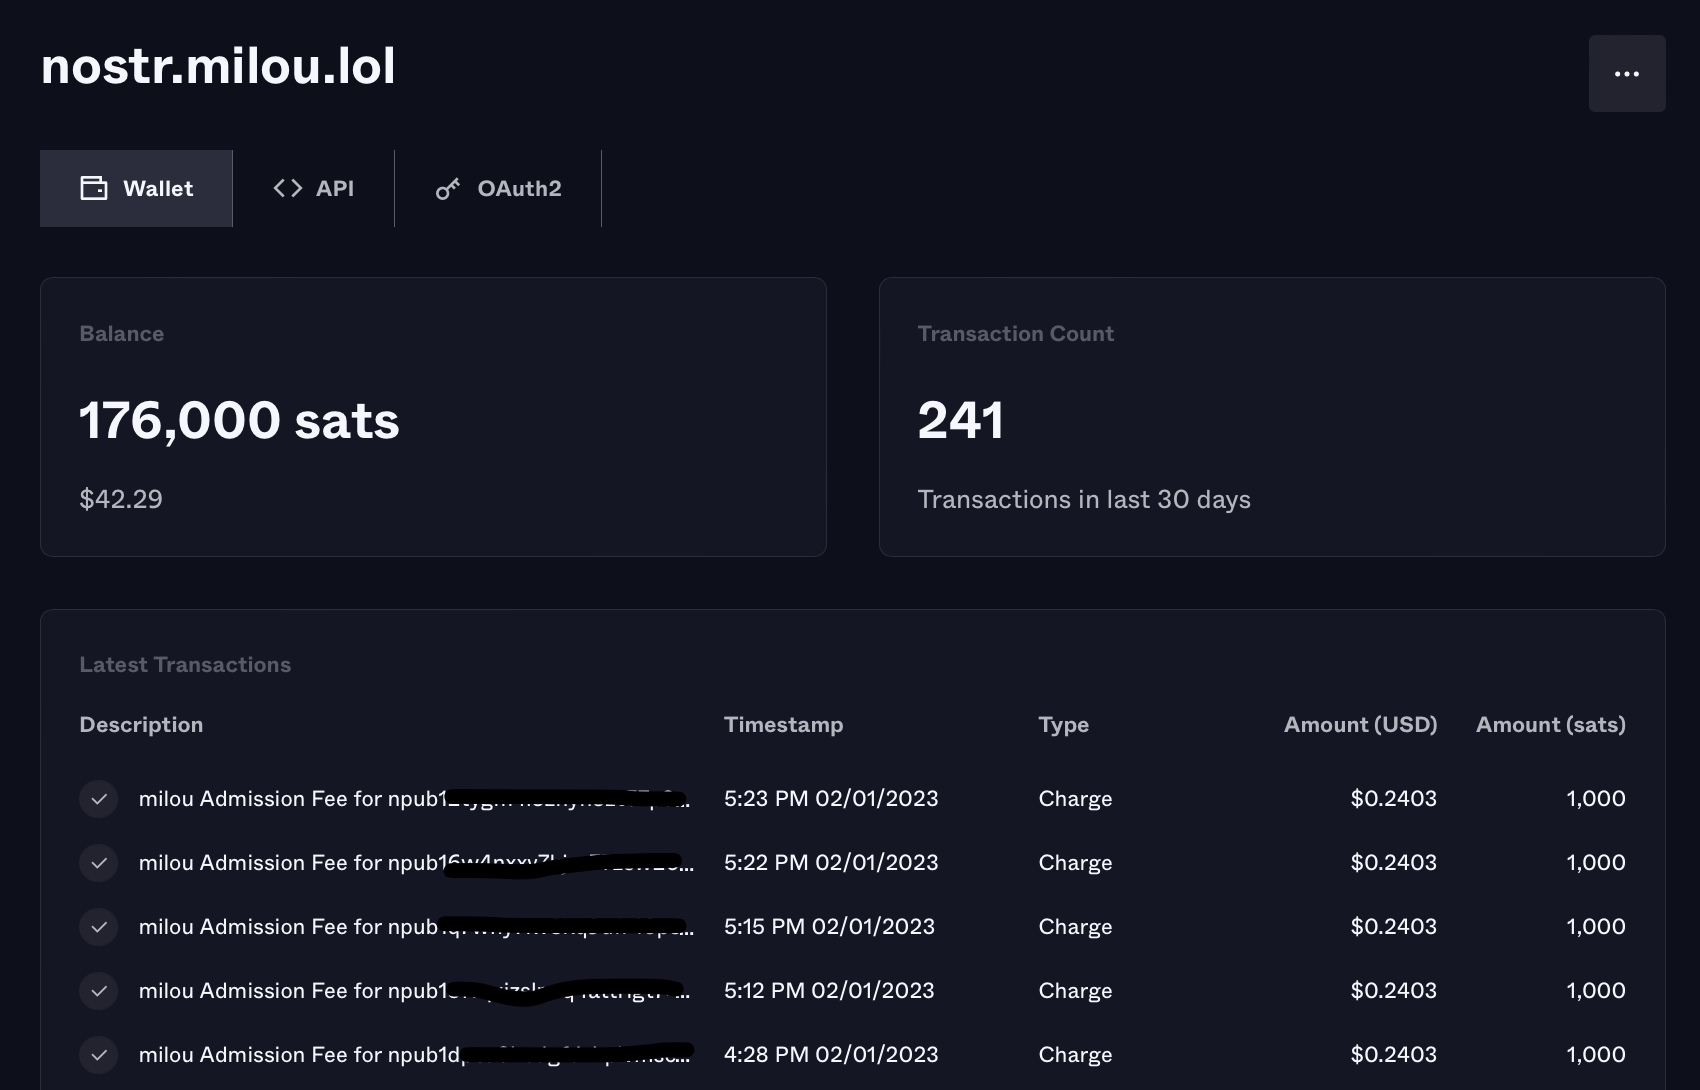
ZEBEDEE is the easiest way to monetize your Nostr relay today!
Use Bitcoin Lightning Network with the ZBD API and start earning revenue for providing distributed infrastructure to the open Nostr network!
Focus on providing the best Nostr relay infrastructure for your users, and let ZBD focus on what we do best — Bitcoin Lightning Network APIs and infrastructure provisioning.
If you’re trying to run a paid Nostream relay, get in touch with me on Twitter @andreneves or DM me on Nostr and I’ll get you onboarded with an invite code.
ZBD provides the industry-leading Bitcoin solutions with the most in depth array of Lightning Network API protocol support ranging from Lightning invoices (BOLT11 payment requests), to LNURLs, to Lightning Addresses, and even Keysend (spontaneous payments). We’re here to support you and your teams on your journey to introduce real value to user experiences!
If you’re building on Bitcoin and Lightning Network, it must be on ZBD.

Till next time!
- AN
Are there plans for a recurring payment plan / method?
’ve recently started using this Nostr relay and wanted to share my experience:
👉 https://relay.reeve.games
So far it’s been extremely stable and fast compared to many public relays I’ve tried.
Connection reliability has been solid, and event delivery feels consistently responsive.